
Affordable DIY Beauty Treatments for Clear Skin and Healthy Hair
Introduction to DIY Beauty Treatments in 2026
Walking down the skincare aisle in 2026 can feel overwhelming—and expensive. With inflation impacting our wallets and ingredient lists looking more like chemistry exams, it’s no surprise that DIY beauty treatments are experiencing a massive resurgence across the USA.
We aren’t just talking about mashing up an avocado and hoping for the best. The modern approach to at-home beauty treatments is smarter, science-backed, and focused on safety. It’s about understanding what your skin actually needs and finding simple, natural ways to provide it.
In my experience, the shift toward natural beauty remedies isn’t just a trend; it’s a lifestyle choice. People want transparency. They want to know exactly what they are putting on their bodies. Whether you are a skincare novice or a beauty guru, this guide will help you navigate the world of homemade care safely.
Here is what we will cover:
- Why these treatments are exploding in popularity.
- How to identify your skin type before starting.
- The best recipes for face, hair, and body.
- Crucial safety tips to avoid common DIY disasters.
Table of Contents
- Introduction to DIY Beauty Treatments in 2026
- Why DIY Beauty Treatments Are So Popular in the USA
- Understanding Your Skin Type Before Trying Homemade Skincare Treatments
- Best DIY Beauty Treatments for Glowing Skin
- Natural Beauty Remedies for Hair Care at Home
- DIY Body Care Treatments for Smooth & Healthy Skin
- Pros and Cons of DIY Beauty Treatments
- Common Mistakes to Avoid with At-Home Beauty Treatments
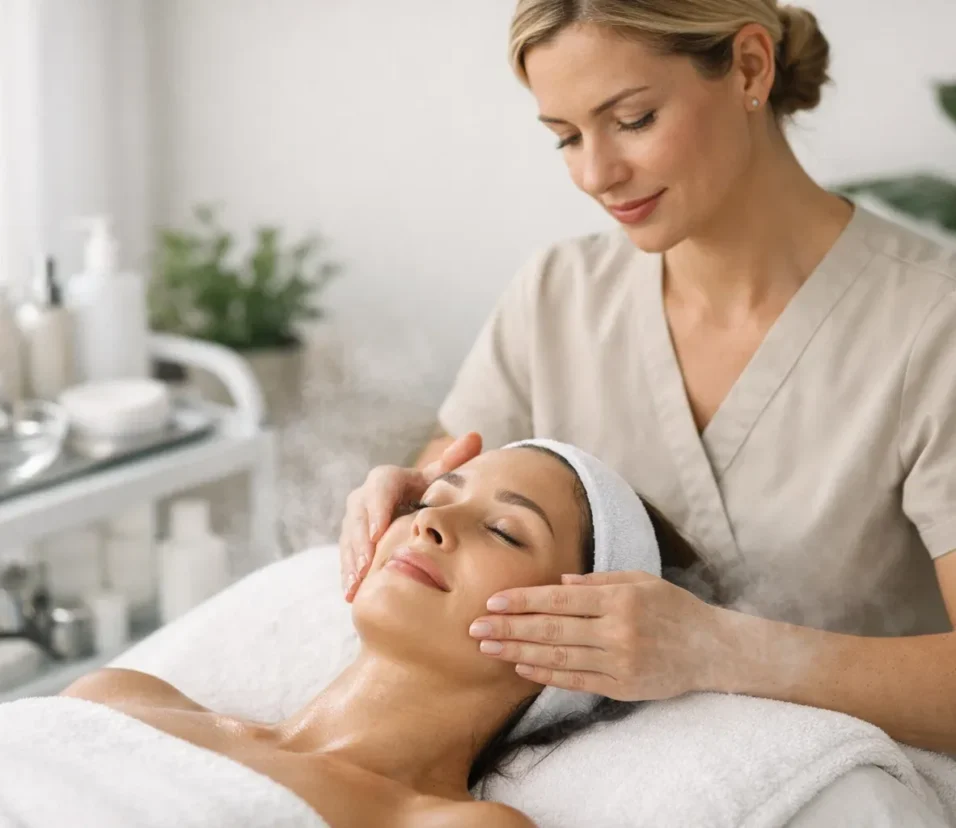
- DIY Beauty Treatments vs Professional Salon Treatments
- Real-Life Experiences & Practical Tips for Better Results
- Are DIY Beauty Treatments Safe for Teenagers & Mature Skin?
- Conclusion – Should You Try DIY Beauty Treatments in 2026?
- FAQs About DIY Beauty Treatments
Why DIY Beauty Treatments Are So Popular in the USA
The rise of DIY beauty treatments is driven by more than just viral TikTok trends. It is a response to the economic and social climate of 2026. First and foremost, professional beauty services have become luxury items for many. A simple facial can cost upwards of $150, making at-home beauty treatments a financial necessity.
Beyond the cost, there is a growing desire for control. When you make a mask in your kitchen, you become the chemist. You decide the quality of the honey or the source of the aloe vera. This control is empowering, especially for those with sensitive skin who often react to hidden preservatives in commercial products.
The “clean beauty” movement has also played a huge role. Consumers are increasingly skeptical of unpronounceable chemicals. Natural beauty remedies offer a return to simplicity. Plus, let’s be honest—there is a convenience factor. Being able to pamper yourself at 9 PM on a Tuesday without an appointment fits perfectly into our busy, often chaotic lives.
- Cost: Significant savings compared to salons.
- Control: No hidden nasties or preservatives.
- Convenience: Spa days on your own schedule.
Understanding Your Skin Type Before Trying Homemade Skincare Treatments
Before you start mixing ingredients, you need to know your canvas. One of the biggest mistakes I see people make is applying a generic recipe to their unique skin. Homemade skincare treatments are not one-size-fits-all.
Oily Skin: You likely have enlarged pores and a shine that appears by midday. Your skin can handle stronger exfoliants like oatmeal or yogurt but avoid heavy oils like coconut oil on your face, as they can clog pores.
Dry Skin: Your skin might feel tight, flaky, or rough. You need moisture. Ingredients like honey, avocado, and olive oil are your best friends. Avoid harsh scrubs or acidic ingredients like lemon juice, which can strip your natural barrier.
Combination Skin: You are oily in the T-zone (forehead, nose, chin) but dry on your cheeks. You might need to “multi-mask”—using a clay mask on your nose and a hydrating honey mask on your cheeks.
Sensitive Skin: If you turn red easily or react to new products, proceed with caution. Always, and I mean always, do a patch test. Apply a small amount of the mixture behind your ear and wait 24 hours to check for a reaction.
- Oily: Needs balancing and light exfoliation.
- Dry: Craves rich hydration and fats.
- Sensitive: Requires patch testing and soothing ingredients.
Best DIY Beauty Treatments for Glowing Skin
Ready to glow? These facial treatments use ingredients you likely already have in your pantry. They are simple, effective, and safe when used correctly.
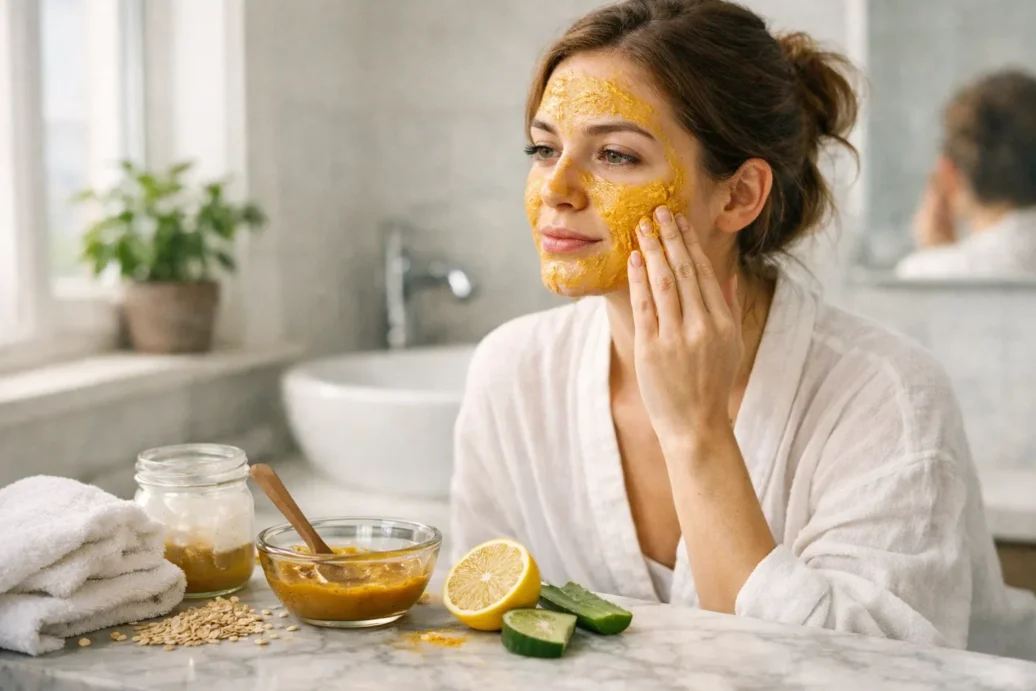
The Turmeric & Honey Glow Mask: This is a classic DIY beauty treatment for brightening. Mix one teaspoon of turmeric powder with two tablespoons of raw honey (and a dash of yogurt if you want extra soothing). Turmeric is anti-inflammatory, while honey is a natural humectant that draws moisture into the skin. Leave it on for 10-15 minutes, then rinse. Warning: Turmeric can stain, so don’t use your best towels!
The Aloe Vera Hydration Bomb: Pure aloe vera gel is a miracle worker for hydration. Mix two tablespoons of aloe gel with a few drops of rosehip oil. Apply generously and let it sit for 20 minutes. It’s perfect for cooling down skin after sun exposure or a long day.
Oatmeal Exfoliating Scrub: Forget those harsh apricot scrubs. Finely ground oatmeal is a gentle way to slough off dead skin cells. Mix ground oats with a little warm water or milk to form a paste. Massage gently in circles for one minute, then rinse. It soothes irritation while smoothing texture.
Coffee Under-Eye Perk-Up: Caffeine constricts blood vessels, which can help reduce puffiness. Mix used coffee grounds with a little coconut oil and gently pat (don’t rub!) under the eyes. Let it sit for 5 minutes before rinsing carefully.
- Turmeric: Brightens and fights inflammation.
- Aloe: Deeply hydrates without grease.
- Oats: Gently exfoliates sensitive skin.
Natural Beauty Remedies for Hair Care at Home
Your face shouldn’t get all the love. Your hair can benefit immensely from natural beauty remedies, often yielding results that rival expensive salon masks.
Coconut Oil Deep Conditioning: This is the holy grail for dry, damaged hair. Warm up virgin coconut oil until it is liquid (but not hot). Apply it from the mid-lengths to the ends of your hair—avoid the scalp if you have oily roots. Wrap your hair in a warm towel and let it sit for at least 30 minutes before shampooing twice to remove the residue.
Egg & Olive Oil Protein Mask: Hair is made of protein, and eggs are packed with it. Whisk one egg with a tablespoon of olive oil. Apply to damp hair and leave for 20 minutes. Crucial tip: Rinse with COOL water. If you use hot water, you will cook the egg in your hair, and getting that out is a nightmare.
Apple Cider Vinegar Rinse: If your hair looks dull, product buildup might be the culprit. Mix one part apple cider vinegar with four parts water. Pour it over your hair after shampooing, let it sit for a minute, and rinse. It balances the scalp’s pH and seals the hair cuticle for extra shine.
- Coconut Oil: Penetrates hair shaft for moisture.
- Eggs: Provide protein for strength.
- Vinegar: Clarifies and adds shine.
DIY Body Care Treatments for Smooth & Healthy Skin
At-home beauty treatments extend to full-body care, too. In fact, body treatments are often the easiest entry point for DIY beginners because the skin on your body is generally less sensitive than your face.
Brown Sugar Body Scrub: Mix one cup of brown sugar with half a cup of olive oil or almond oil. The sugar granules are softer than salt, making for a polished but gentle exfoliation. It’s excellent for use in the shower before shaving to prevent ingrown hairs.
Coffee Cellulite Scrub: While no scrub can permanently remove cellulite, caffeine can temporarily tighten the skin and improve blood flow. Mix coffee grounds with coconut oil and massage vigorously into thighs and buttocks. It’s messy, but your skin will feel incredibly smooth afterward.
Milk Bath Soak: Channel your inner Cleopatra. Add two cups of powdered milk (or a few cups of liquid whole milk) to your warm bath water. The lactic acid in milk gently exfoliates dead skin cells while the fats hydrate. Add a few drops of lavender essential oil for a relaxing spa experience.
- Sugar Scrub: Preps skin for shaving.
- Coffee Scrub: Boosts circulation.
- Milk Bath: Softens rough skin effortlessly.
Pros and Cons of DIY Beauty Treatments
Before you go all in, it is important to weigh the good with the bad. Homemade skincare treatments are amazing, but they aren’t perfect.
Pros: The biggest advantage is cost. You can get months of treatments for the price of one store-bought jar. There is also total transparency; you know exactly what is in the jar because you put it there. Customization is another huge plus—you can tweak recipes to fit your skin’s mood that day. Plus, reusing glass jars and reducing plastic packaging makes this an eco-friendly choice.
Cons: The lack of preservatives means these mixtures spoil quickly. You usually have to use them immediately or store them in the fridge for only a few days. Consistency can also be an issue; one batch might be perfect, while the next is too runny. And sadly, DIY isn’t a cure-all. For severe acne, rosacea, or eczema, kitchen ingredients are often not powerful enough and can sometimes irritate inflamed skin.
- Pro: Affordable and transparent.
- Con: Short shelf life (no preservatives).
- Con: Variable results.
Common Mistakes to Avoid with At-Home Beauty Treatments
Safety is my top priority when discussing DIY beauty treatments. Just because something is “natural” doesn’t mean it’s harmless. Poison ivy is natural, but you wouldn’t put it on your face.
The Lemon Juice Trap: Please, avoid putting straight lemon juice on your face. It is highly acidic and disrupts your skin’s pH mantle. It can also make your skin extremely sensitive to the sun, leading to severe burns or hyperpigmentation (phytophotodermatitis).
Over-Exfoliating: It feels good to scrub, but doing it too often damages the skin barrier. Stick to exfoliating once or twice a week. If your skin looks shiny (like plastic) or feels tight, you are overdoing it.
Ignoring Expiration Dates: That yogurt in your fridge has an expiration date for eating, and the same applies to your face. Bacteria love warm, damp environments. Never use ingredients that have turned or smell off.
Dangerous DIY Peels: I have seen terrifying trends of people buying high-strength chemical acids online to do “at-home peels.” Do not do this. Chemical burns can cause permanent scarring. Leave the deep peels to the professionals.
- Lemon: Too acidic for direct use.
- Hygiene: Bacteria grows fast in DIY mixes.
- Chemicals: Never DIY professional-grade acids.
DIY Beauty Treatments vs Professional Salon Treatments
When should you DIY, and when should you call a pro? It’s a common question.
DIY Beauty Treatments are excellent for maintenance. They are great for hydration, mild exfoliation, and relaxation. Think of them as the daily brushing and flossing for your skin. They are cost-effective and keep your barrier healthy between bigger treatments.
Professional Treatments are for correction. If you are trying to erase sun damage, treat deep wrinkles, or manage severe acne, cucumber slices won’t cut it. Professionals have access to lasers, medical-grade peels, and potent actives that penetrate deeper than any kitchen ingredient.
I advise using natural beauty remedies to maintain your glow, but saving your budget for professional help when you have a specific, stubborn skin concern.
- DIY: Best for maintenance and hydration.
- Pro: Necessary for correction and deep issues.
Real-Life Experiences & Practical Tips for Better Results
I remember the first time I made a hair mask. I used way too much coconut oil and didn’t wash it out properly. I went to work the next day looking like I hadn’t showered in a week. Lesson learned: start with less than you think you need.
Another tip from experience is to use high-quality ingredients. The cheap, “fake” honey in the bear bottle is mostly corn syrup and won’t give you the antibacterial benefits of raw, organic honey. If you are going to do it, invest in the real stuff.
Consistency is key. One turmeric mask won’t change your life. But doing it every Sunday for two months? That’s when you see the change. Treat your at-home beauty treatments with the same discipline you would a prescription.
Finally, manage your expectations. Natural remedies are gentle. They work slowly. Don’t expect overnight miracles, but do expect healthier, happier skin over time.
- Quality: Ingredients matter (get raw honey).
- Quantity: Less is often more.
- Patience: Natural fixes take time.
Are DIY Beauty Treatments Safe for Teenagers & Mature Skin?
Skin needs change drastically with age, and your DIY approach should too.
For Teenagers: Teen skin is often oily and prone to hormonal breakouts. Simple, non-comedogenic ingredients are best. An oatmeal mask or a diluted apple cider vinegar toner can be helpful. However, teens should avoid harsh physical scrubs (like walnut shells) that can tear acne-prone skin and spread bacteria.
For Mature Skin: As we age, our skin produces less oil and becomes thinner. The goal here is moisture retention. Homemade skincare treatments with avocado, yogurt, and oils are fantastic. However, avoid “tightening” masks like egg whites, which can dry out mature skin too much. Also, accept that DIY cannot replicate Botox or fillers; it can only support skin health.
Parental Tip: If your teen is getting into DIY beauty from social media, supervise them. Make sure they aren’t mixing dangerous concoctions (like toothpaste on pimples—a big no-no) that could damage their skin barrier permanently.
- Teens: Focus on gentle cleansing, not scrubbing.
- Mature: Focus on rich hydration and lipids.
Conclusion – Should You Try DIY Beauty Treatments in 2026?
So, is the DIY route right for you? In 2026, the answer is a resounding yes—with caveats. DIY beauty treatments offer an accessible, affordable, and enjoyable way to care for yourself. They reconnect you with the rituals of self-care and give you control over what touches your body.
However, they require a safety-first mindset. They are not a replacement for medical care, and they require common sense. If you approach them with realistic expectations and a respect for your skin barrier, they can be a wonderful addition to your routine.
My advice? Start small. Try a honey mask this weekend. See how your skin feels. You might find that the best beauty secrets weren’t in a department store all along—they were in your kitchen cabinet.
- Start Simple: Pick one low-risk recipe.
- Stay Safe: Avoid harsh acids and allergens.
- Enjoy It: Make it a relaxing ritual.
FAQs About DIY Beauty Treatments
Are DIY beauty treatments really effective?
Yes, for specific concerns like dryness, mild exfoliation, and temporary brightening. Ingredients like honey, oatmeal, and aloe vera have proven scientific benefits for the skin. However, they are generally less potent than formulated clinical skincare products.
How often should I use homemade skincare treatments?
It depends on the treatment. Hydrating masks (like honey or yogurt) can be used 2-3 times a week. Exfoliating scrubs (like sugar or coffee) should be limited to once a week to avoid damaging the skin barrier.
Can natural beauty remedies replace professional treatments?
Not entirely. While they are great for maintenance and general skin health, they cannot replicate the results of professional lasers, deep chemical peels, or treatments for severe conditions like cystic acne.
What ingredients should never be used on the face?
Avoid using lemon juice, baking soda, toothpaste, cinnamon, and hot spices on your face. These can disrupt the skin’s pH balance, cause chemical burns, or trigger severe allergic reactions.
How long do DIY beauty products last?
Because they lack preservatives, most DIY treatments should be used immediately. If stored in a clean, airtight container in the refrigerator, some (like toner or oil blends) may last 3-5 days, but watch for mold or off smells.
Are at-home beauty treatments safe for sensitive skin?
They can be, but you must choose calming ingredients like oatmeal, aloe, and honey. Always perform a patch test on your inner arm 24 hours before applying anything new to your face to check for reactions.
Can DIY treatments cause permanent damage?
Yes, if used incorrectly. High-strength acids, rough physical scrubs, or caustic ingredients like undiluted essential oils can cause burns, scarring, and hyperpigmentation. Always follow safe recipes and instructions.
Disclaimer:
This article is for informational and educational purposes only. DIY beauty treatments may not be suitable for everyone. Always perform a patch test before trying any new ingredient and consult a licensed dermatologist or healthcare professional if you have sensitive skin, allergies, or underlying skin conditions. The author is not responsible for any adverse reactions resulting from the use of homemade skincare treatments.
Leave feedback about this